


Replacing an old hardwood floor in San Diego can be a major investment. But in many cases, full replacement isn’t necessary — quality hardwood floors can often be repaired, restored, or partially replaced. The key is knowing whether your flooring is “restorable.”
Joseph Okhotin, founder of California Floors — one of San Diego’s most trusted flooring companies — explains how to recognize the signs of damage and what solutions make sense in our local climate and construction conditions.
Wood Floor Repair Isn’t Like a Full Home Remodel
In San Diego homes, the first signs of wear and tear on hardwood floors typically appear after about five years of use. Pay special attention to areas around heating vents, doorways, and high-traffic zones.
Look for:
-
Scratches and chips
-
Squeaks or hollow-sounding planks
-
Warping or swelling
-
Uneven surfaces
Tip: Don’t wait until a full renovation to fix your floors. Acting early can save you time, money, and prevent long-term damage.
Which Repair Method Is Right for You?
1. Sanding & Refinishing – From $3 per sq. ft.
This is one of the most effective ways to refresh wood floors that show signs of wear. Sanding removes a thin top layer of wood, including minor surface imperfections, and is followed by refinishing to apply a new protective coating.
When to choose this method:
-
The finish is worn in specific areas
-
Light scratches and chips are visible
-
Boards are structurally intact
When this method won’t help:
-
Deep dents or structural damage
-
Boards are warped, swollen, or heavily dried out
-
Large areas show signs of mold, rot, or insect damage
-
Planks have been sanded too many times before (less than 2mm thickness remaining)
Note: Don’t refinish more than once every 5 years to avoid reducing floor thickness and durability.
2. Partial Plank Replacement – From $2 per sq. ft.
For isolated damage like cracks, dents, or swelling from spills, partial board replacement is a cost-effective solution.
Common issues resolved by this method:
-
Cracks and surface chips
-
Sunken or squeaky spots
-
Warping from localized moisture
-
Mismatched planks (e.g., permanent stains or color damage)
Tip: Matching the color and grain of replacement planks is essential. If mismatched, you may need to tone the entire floor for uniformity.
3. Full Restoration – From $2 per sq. ft.
Used when the subfloor or structure beneath the wood is damaged — often from leaks or flooding. Boards may begin to mold from the inside out if left untreated.
If more than 15% of your floor is affected, a full replacement may be more practical than trying to patch and color-match dozens of sections.
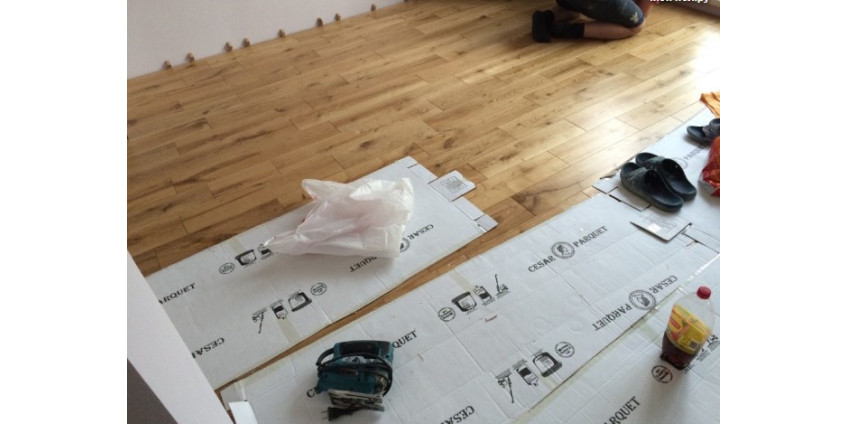
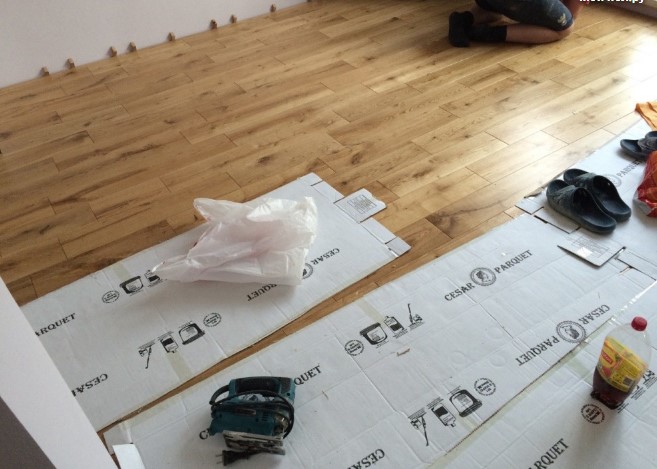
How Professional Restoration Works
Step 1: Prep the Space
All furniture is removed, and protective measures are taken. While professionals use dust-collection vacuums, some dust is inevitable during sanding.
Step 2: Addressing Specific Damage
-
Gaps between planks: Small gaps are filled with wood filler. Larger ones may require installing new inserts or reassembling entire sections.
-
Squeaky floors: Caused by loose planks or detached subfloor. Fixed by re-fastening boards or, if needed, replacing the damaged area.
-
Scratches: Minor ones can be camouflaged with wood-colored markers or filler, then resealed.
-
Uneven flooring: Small height differences are corrected by sanding. Larger deformations may need plank removal and subfloor adjustments.
-
Swelling from moisture: Small areas can sometimes be dried with heat and pressure. Larger water damage usually requires plank removal and drying or replacing the base layer.
-
Discoloration: Caused by poor-quality finishes or chemical spills. Restored with sanding, refinishing, and possibly staining to even out the tone.
Step 3: Sanding the Floor
Specialized sanding machines smooth the surface, removing imperfections and prepping it for finishing.
Step 4: Filling Cracks & Deep Scratches
A professional-grade filler is applied to damaged areas, then sanded for a seamless finish.
Step 5: Finishing
The final step is applying a protective coating — either polyurethane lacquer for a glossy, durable finish or oil-wax for a more natural look that penetrates deeper into the wood.
Post-Restoration Floor Care in San Diego
To keep your restored floor in top shape:
-
Maintain indoor humidity between 40–65% and temperature around 70–78°F
-
Avoid direct sunlight exposure
-
Use entry mats and felt pads under furniture
-
Clean with a soft mop and wood-specific cleaning products
With proper care, your hardwood floor can last 50 years or more after professional restoration.
Final Thoughts
Don’t rush to rip out your old floors — in most San Diego homes, restoration is a smart, eco-friendly, and cost-effective solution.
At California Floors, we’ve helped hundreds of local homeowners revive their hardwood floors with precision and care. Whether your floor needs minor touch-ups or a full overhaul, we’re ready to help.
Ready to bring your hardwood floor back to life? Contact California Floors today for a free estimate.